August 19, 2013

Italian Dark Chocolate Espresso Cupcakes

I've been on the search for a chocolate cupcake that actually rises and has a nice dome after it cools. I found it! I think this might end up being my go-to chocolate cupcake recipe. The espresso wasn't too strong of a flavor. In fact, if I make this recipe again, I'd probably increase the amount of espresso in the cake. For normal chocolate cupcakes I'll halve the espresso.


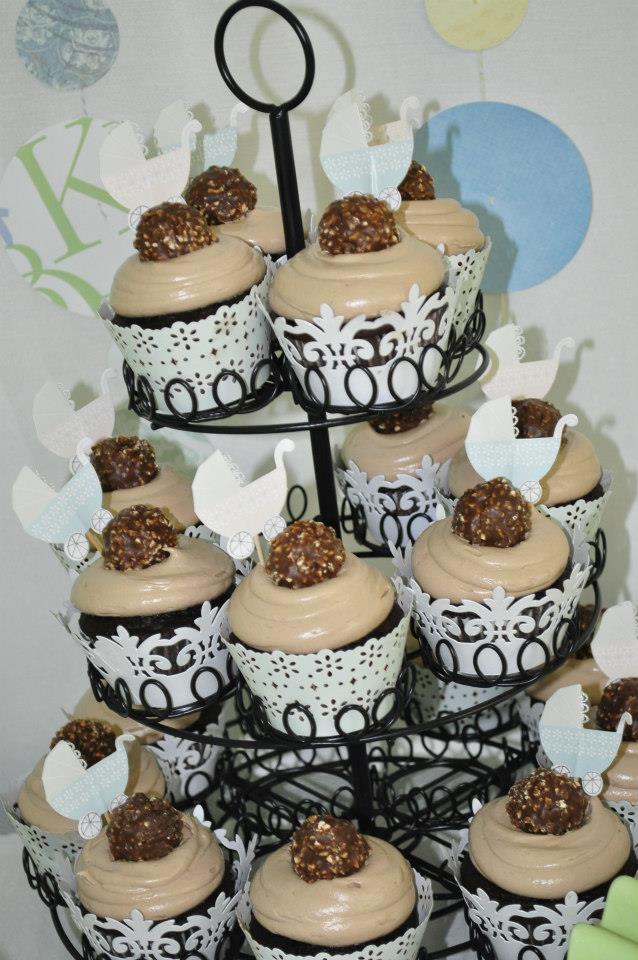
Italian Dark Chocolate Espresso Cupcakes:
Dark Chocolate Cupcakes
Whipped Ganache
Mascarpone Buttercream

~Dark Chocolate Cupcakes~
1 c butter, unsalted
1/2 c unsweetened dark cocoa powder
5 oz bittersweet chocolate, chopped
2 tsp instant espresso powder
1 1/2 c sugar
4 large eggs
1 3/4 c all purpose flour
1 tsp kosher salt
1 tsp baking powder
1 tsp baking soda
1 c sour cream

Preheat oven to 350-degrees. Line 24 muffin cups with paper liners.

In a medium saucepan, combine butter, cocoa, chocolate and espresso powder. Cook over low heat, stirring constantly, until chocolate melts and mixture is smooth. Let cool for 20 minutes.


Separate egg whites from egg yolks. In a large bowl, beat sugar and egg yolks at medium-high speed with a mixer until light yellow and fluffy. In another medium bowl combine flour, salt, baking powder and baking soda.

Gradually add to sugar mixture, beating until combined. Add chocolate mixture, stirring until smooth. Stir in sour cream. In a separate bowl, beat egg whites until stiff peaks form. Add 1/3 of egg whites to batter to lighten up your mixture. Fold the remaining 2/3 of your egg whites until batter is homogenous and airy.


Spoon batter into prepared muffin cups, and bake for 12-14 minutes or until a wooden pick inserted into the center comes out clean. Let cool in pan for 10 minutes.

I used my cupcake corer to take out the center. You can use a paring knife and use the cone method to take the center out.


~Whipped Ganache~
1 1/2 cups bittersweet chocolate (or semi-sweet if you don't like a strong flavor)
1 cup heavy cream
1 tsp espresso
1 tsp vanilla extract

Put all ingredients in a double boiler. Stir until melted. Take bowl and allow mixture to cool for at least 1 hour in the fridge. With an electric beater, whip ganache until it is between soft and stiff peaks. Don't over do it with the whipping otherwise it will set up too hard. Once it is whipped, allow the mixture to set for about 5 minutes before you pipe.


Pipe the ganache into your cupcakes.


~Mascarpone Buttercream~
8 oz Mascarpone Cheese, room temperature
1 cup heavy cream
1 1/2 cups powdered sugar

Whip heavy cream until stiff peaks form. In a separate bowl, mix mascarpone and powdered sugar together. Add 2/3 cup of heavy cream to mascarpone/sugar mixture and then fold in remaining heavy cream. Allow it to set up in the fridge for about 5-10 minutes. Pipe onto your cupcakes.


Store your cupcakes in the fridge but if you are going to eat them then I would suggest letting them sit at room temperature for a little while. Hope you enjoy them!

August 14, 2013

Tiramisu Cupcakes

These cupcakes were truly Ah-maz-ing!! They were a lot of work but completely worth it.

Tiramisu Cupcakes
Recipe courtesy of Culinary Concoctions by Peabody


Tiramisu Cupcakes
white cupcakes (recipe follows)
espresso chocolate mousse (recipe follows)
1/4 cup coffee or espresso
mascarpone frosting (recipe follows)
cocoa powder for dusting

White Cupcakes
1 ½ cups all-purpose flour
1 cup cake flour (you can use all-purpose if you need)
1 TBSP. baking powder
1 tsp salt
½ cup unsalted butter, at room temperature
¼ cup vegetable oil
1 ½ cups granulated sugar
1 tsp vanilla extract
1 cup whole milk
5 egg whites
Sift together flours, baking powder and salt in a medium bowl; set aside.
In a mixing bowl (if using a stand mixer use the paddle attachment), cream butter and sugar until light and fluffy, about 3 minutes.
Add vanilla extract and beat until incorporated.
In a liquid measuring cup, combing vegetable oil and milk.
Add flour mixture and milk/oil mixture alternatively to the mixing bowl. Beating on low speed after each addition.
Pour mixture into a large bowl. Scrape down to make sure you get all of the batter.
Clean out bowl and switch to whisk attachment.
Beat egg whites until stiff peaks form.
Fold 1/3 of the egg whites into the batter, to “lighten” the batter. Gently fold in the remaining egg whites.
Grease and lightly flour muffin pans. Fill each cup half full.
Bake at 375 degrees for 18 to 20 minutes or until done.
Cool on a wire rack.

Espresso Chocolate Mousse
2 cups chilled heavy cream
4 large egg yolks
4 TBSP sugar
2 tsp espresso powder
8 oz fine-quality semisweet chocolate, finely chopped
Heat ¾ cup cream in a 1-quart heavy saucepan until hot.
Whisk together yolks, sugar, espresso powder, and a pinch of salt in a metal bowl until combined well, then add hot cream in a slow stream, whisking until combined.
Transfer mixture to saucepan and cook over moderately low heat, stirring constantly, until it registers 160°F on thermometer. Pour custard through a fine-mesh sieve into a bowl.
Melt chocolate in a double boiler, stirring frequently. Whisk custard into chocolate until smooth, then cool.
Beat remaining 1 ¼ cups cream in a bowl with an electric mixer until it just holds stiff peaks. Whisk one fourth of cream into chocolate custard to lighten, then fold in remaining cream gently but thoroughly.

Mousse recipe adapted from Gourmet December 2002
Mascarpone Frosting
2 cups heavy whipping cream
8 ounces Mascarpone cheese, at room temperature
1 ½ cups powdered sugar
Using and electric mixer, whip the cream until stiff peaks form.
In a mixing bowl, fold 2/3 cups of the whipped cream into the Mascarpone cheese, along with the powdered sugar.
Add remaining cream. Blend until cream is fully incorporated.
Place in refrigerator until ready to frost.

Assemble:
Using the cone method, fill cupcakes with Espresso Chocolate Mousse filling. Place top back on top of cupcakes. Brush top of cupcake with coffee or espresso. Go light on this as they are fresh cupcakes, and not hard like most ladyfingers. You don’t want to soak them.
Frost top with Mascarpone Frosting.
Sprinkle cocoa powder on top of cupcakes.


Just take note that you will have a lot of leftovers of the mousse and the frosting. To be honest, I didn't mind at all. Both were delicious to eat by themselves. I put the leftover mousse in ramekins and then I'd top them with the frosting. MMMMMMM! Yum! If you don't want so much leftover then halve the mousse recipe. As for the frosting, be generous when putting it on your cupcakes and then eat the rest :)

August 1, 2013

Cannoli Cupcakes


Cannoli Cupcakes

Ingredients:

~Vanilla Cupcakes~
2 1/2 cups AP flour
1 tsp baking powder
1/2 tsp baking soda
1/2 tsp salt
3 eggs
2 cups sugar
1 cup oil
2 tsp vanilla extract
1 cup sour cream

~Chocolate Chip Cannoli Cream~
16 oz. whole milk ricotta cheese (strained in a cheesecloth overnight)
3/4 cup confectioners sugar
1/2 tsp vanilla extract
1/2 cup mini semisweet chocolate chips

~Fresh Whipped Cream~***
2 cups heavy cream
1 package white chocolate or dark chocolate pudding mix

***Note: This is what I used but not what I recommend. Once it was mixed it had a consistency of a thick mousse and it was so incredibly hard to pipe. I would never use this portion of the recipe again.

~Garnish~
Mini semisweet chocolate chips

What To Do:

Combine flour, baking powder, baking soda and salt in a medium bowl.
In a large bowl beat eggs and sugar until light and fluffy (about 3 minutes).
Add the oil and vanilla; mix batter.
Add sour cream; mix batter.
Add dry ingredients to the wet ingredients and mix until well blended.

Preheat your oven to 350. Line cupcake pan with 24 liners.
Fill each well until 3/4 full and bake for 15-18 minutes.
Cool completely.

Next, make your cannoli cream filling: Beat ricotta, confectioners sugar and vanilla in a bowl on medium until light and fluffy. Stir in chocolate chips.

To make the whipped cream mix the heavy cream and pudding mix until cream is whipped. Again, take note that I did not like this portion of the recipe. It tasted ok, but it was a pain to get it onto my cupcakes. When I do this recipe again, I would try to find a white chocolate or dark chocolate whipped frosting recipe.

To assemble your cupcakes: Use a small knife or a cupcake corer to remove a small cylinder from the center of the cupcake. Fill with cannoli cream. From your cylinder cut the top-most portion off and use that to top off the cannoli cream center.

Pipe your whipped cream (or whichever frosting you choose). Top with chocolate chips.


Even though I didn't like the frosting, I did like these cupcakes. They tasted incredibly rich and I was told by geniune Italians that they tasted like Cannoli's. They were easy to make, too, so give them a shot. Enjoy!

July 8, 2013

Blueberry Scones with Fresh Lemon Glaze

If you've read my Scones post, you know how much I love scones. I have never used fresh fruit but my parents brought home 3 pints of blueberries so I wanted to give it a shot. What goes perfectly with blueberries? Lemon, of course. And so, my blueberry scones with fresh lemon glaze were born.


~Ingredients~
In a large bowl, sift together
4 cups of AP flour
1/4 cup of sugar
2 tbs baking powder
2 tsp kosher salt
Zest of two lemons

In a separate, medium bowl mix together:
3/4 pound (3 sticks) of slightly cold butter that has been cut into pea-sized cubes with a butter knife
4 extra large eggs
1 cup of half-and-half (you could even use whole milk)

Blueberries

~What to do~


I use a hand mixer to blend the wet ingredients until half of the butter no longer resembles cubes (start with the milk and eggs first, mix, and then add the cubed butter). Don't beat this mixture too long, it's not meant to be homogenous.
I add the wet ingredients into the bowl with the dry ingredients. With my hand mixer on low I lightly beat the two elements. I blend only until the liquid is incorporated into the flour. I stop using the hand mixer and then dig in with my hands. Then I added the blueberries. I didn't measure the blueberries, I eye-balled it until there were enough for my taste. Also, I tasted my blueberries beforehand and found that they weren't all that sweet so I added a few more tablespoons of sugar to my dough. Gently, mix the blueberries into your dough with your hands so you don't crush the berries.


Do your best to blend all the ingredients together. The dough is supposed to be lumpy. Then, using your fingers, pick up small amounts of dough and drop them onto a baking sheet lined with parchment paper. Making scones in this 'drop' method helps keep the air inside. Just scoop with your fingers and drop onto the sheet and be sure to leave at least 1.5 inches between each scone. Put them into the oven at 400 degrees for 10-15 minutes and then check on them. I baked mine for about 10 minutes. The bottoms of my scones were light brown in color and the juice from my berries was coming out. I could have baked them longer but chose not to.

~Lemon Glaze~

2 cups powered sugar
Juice of one lemon
2-4 tbs half and half or milk

Mix ingredients until you get the right consistency.

Once your scones have cooled, drizzle your glaze liberally.

mmmmm MMMMMMMMM I hope you enjoy these lovely scones. I certainly did!

June 30, 2013

Amish Custard Pie

I love going to Lancaster County, Pennsylvania. It is an area of the northeast with a large population of Amish people. Amish people are kind and many keep a distance from the 'English' (anyone not Amish) but they are wonderful craftspeople and incredibly hardworking. Amish food is always hearty, delicious and unprocessed. I found this recipe for a custard pie and I knew that I had to try it.

Amish Custard Pie
Courtesy of: http://www.mrfood.com/Pie/Amish-Bakery-Custard-Pie/ml/1

Serves 8 (one 8 inch pie)

Ingredients

One prepared pie crust
3/4 cup granulated sugar
1/4 cup cornstarch
1/4 tsp salt
2 1/2 cups half and half
1/2 cup (1 stick) unsalted butter
1/4 cup packed, light brown sugar
1 tsp vanilla extract
Ground cinnamon, for sprinkling

What to do:

Preheat your oven to 325 degrees.

In a medium saucepan, combine sugar, cornstarch, salt and half and half. Keep on medium heat, whisking often. Don't make the mistake that I did by leaving your pan to take pictures for your blog... The bottom on my pan had a thick coating of starch and sugar when I went back. Once the mixture is bubbling and thick, take your pan off the heat.


Immediately, add the butter, brown sugar and vanilla extract and whisk until butter is melted and contents of your pan are homogeneous. Pour custard into prepared pie plate. Sprinkle a light dusting of cinnamon on top. By the way, I poured my custard through a sieve in order to get the clumps of starch out. I successfully rescued my pie.


Bake for 35 minutes. The center will not be set. Allow the pie to cool for 1 hour and then refrigerate for 7-8 hours. The time in the refrigerator will allow the pie to set. You can let it sit in the refrigerator longer, obviously, but be sure to cover your pie.


This pie is definitely a keeper. I let the pieces sit at room temperature for a little bit before eating. The flavor is milky with a beautiful hint of cinnamon. It was enjoyed by all. I do wish it was a little less sweet. I don't know if less sugar would impact the consistency. My guess is that it would because there are no eggs in this recipe. If you pair it with some tea or coffee then it will be perfect! This recipe is most certainly simple thanks to using a prepared pie crust. It took me about 20 minutes from start to finish before putting it in the oven. Now, Amish food is unprocessed so you must be asking, 'why use a prepared pie crust?' Why? Because, Ain't Nobody Got Time For That! Hahaha. If you have a recipe for homemade pie crust then I encourage you to use that. I still have never made pie crust from scratch, but that's for another adventure!

I hope you enjoy this recipe from the Amish!

June 22, 2013

Suggestions?

I think it is so cool that I have people from around the world checking out my blog. I've noticed that there are a few people in several different countries checking me out. Russia, Germany, UK, Malaysia, Canada, India, New Zealand, Cyprus, Romania and others. I just wanted to say thank you.

I also have been wanting to make desserts that are international and post them on my blog. If you have any suggestions as to what I could make, I would love to hear from you! Just drop me a suggestion at kaitlynskupcakes@gmail.com.

I look forward to your suggestions!
Kaitlyn

June 10, 2013

Banana Pudding Trifle

Trifles are a quick and easy dessert that are great for large groups of people because they're inexpensive. It's a semi-homemade recipe that's always a hit.

My family was planning on going on a picnic so I wanted to make Banana Pudding Trifle but because we were going to a beach, I decided to make individual servings and put them in canning jars. Easy to transport and easy to eat.

This recipe can make atleast 12 individual 2-cup servings.


~Ingredients~

3 cups of cold milk
1 package (5.1 oz) Banana Pudding
3 Bananas, sliced (The tops and bottoms of the bananas should be a little green)
1 large tub of whipped topping
1 (12 oz) prepared pound cake
1 box vanilla wafers, crushed
-------------------------------------------------------------------------------

Take out your whipped topping so that it comes to room temperature.

Cube your pound cake into small pieces. Mine were 1cm x 1cm because of the size of my canning jars.

Mix together milk and pudding until smooth. Stir in sliced bananas with a spatula. Set aside.

Grab your container and begin your assembly line. Layer the pound cake on the bottom, followed by the pudding, followed by the whipped topping and then the crushed vanilla wafers. Repeat all 4 layers: cake, pudding, whipped topping, vanilla wafers.

Refrigerate until ready to serve.

Nomnomnom


June 4, 2013

My Cinnamon Buns

I love Cinnamon Buns. The sweet, fluffy, cinnamony goodness is irresistible especially with a nice cup of coffee. I've had Cinnabon once in my life and although it was delicious my teeth hurt and I'm pretty sure I gave my grand children diabetes. I've been wanting to make Cinnamon buns with less sugar so I don't feel sick and guilty after eating them. Until recently, I've had a phobia of working with yeast. I don't know why but yeast intimidated me. Well, I got over it and now here we are.

I found a recipe on Pinterest and I made it about 3 days ago. I wanted to make sure that I found a recipe that called for ingredients that were already in my fridge and pantry. I didn't feel like buying new ingredients. Well, they turned out fine. My brother and his family enjoyed them and they asked me to make it again. The original recipe was really sweet and I messed up the yeast because it didn't proof. So I tried again. SUCCESS! I want to share with you my less sweet version of Cinnamon buns.

Cinnamon Buns
Makes 12

Dough:
1 envelope Yeast
1 cup warm milk
1 tbs sugar
----------------
1/4 cup sugar
1/3 cup unsalted butter
1 tsp salt
2 eggs plus 1 yolk
4 cups AP flour

Filling:
1/2 cup brown sugar
1/2-2/3 cup finely chopped walnuts
2 1/2 tbs cinnamon
1/3 cup unsalted butter (softened)

Icing:
8 tbs unsalted butter
1 1/2 cups powdered sugar
1/4 cup cream cheese
1/2 tsp vanilla
1/8 tsp salt

~Directions~


This is the yeast I used. I needed to proof it. So I heated the milk to 100-110 degrees F, added 1 tbs sugar and whisked in the yeast. Whisk until the yeast dissolves. Don't use a spoon to mix the yeast or you'll regret it. Leave it for 10 minutes. Meanwhile, gather your other ingredients. I used my Kitchen Aid with a paddle attachment to add the remaining dough ingredients. If you like sweeter buns then add 1/2 cup of sugar here, otherwise, carry on. Once the 4 cups of flour are just mixed, switch to the dough hook and let it go for about 5-8 minutes. If you're a tactile person or if you feel the need to knead your dough then you are more than welcome to do so. Place the dough in a buttered bowl, cover with a clean towel and place in a warm, dark place for 1 hour.


Mix the filling in a separate bowl. Again, if you have a real sweet tooth then feel free to add more brown sugar. I thought the sugar was perfect.

After an hour of rising, take out the dough and lightly knead it. Use a liberal dusting of flour because this dough is very sticky. I didn't have a board or work space large enough so I used my fondant mat. Nor did I have a rolling pin long enough so I used my fondant rolling pin.


I didn't measure my rectangle. I just kept working at the dough until it was about 1/4 inch thick and resembled a rectangle. Once it was done, I spread the butter on with an off-set spatula and sprinkled my filling evenly.


The benefit of using my fondant mat was that it aided in the rolling the dough. Be sure to roll along the long side of your rectangle. Work evenly and take your time. You don't want the dough to be too loose.


Next, use a knife to score the top of the roll. Make 11 scores so you get 12 pieces. Get some dental floss (unminted) so you can make the cuts. I didn't have floss so I used butcher's twine. The floss will give you clean, uncrushed buns. Slide the floss underneath the roll, cross the ends and pull.


Place your buns into a buttered 9x13 dish. From here you can bake them because they are ready. I covered my dish with saran wrap and placed it in the refrigerator over night.

Before:


The next morning:


Preheat to 400 degrees. While oven is preheating, spread a small amount of butter over each bun. Bake for 20 minutes.

While your sweet morsels of yumminess are baking you can make the frosting. Simply blend the ingredients until the frosting is fluffy. This frosting is sweet but I would rather have a really sweet frosting on top so I can control the amount that is placed on the buns. Once the buns are done, let them cool about 15-20 minutes. Frost slowly. I put about 2 tbs on each bun and let it sit on the warm bun for about 2-3 mins and then gently spread the frosting.

I hope you enjoy them! Happy Baking!!

April 17, 2013

Nutella Swiss Buttercream

I've developed a slight distaste for American buttercream because it is so sweet and the flavor is so-so. For Sarah's baby shower, I was searching for a Nutella buttercream for the Ferrero Rocher cupcakes and I came upon Nutella Swiss buttercream. I've never made any kind of Swiss buttercream up until that point so I was unsure of how it would turn out but I had beginner's luck on my side and the buttercream came out wonderfully well. I was so pleased. It wasn't too sweet but you could taste the Nutella. Plus, it was fluffy and creamy. What more could you ask for?

If you're wondering about the cupcake itself, I cheated. I used a box mix because I've never been truly satisfied with my from-scratch chocolate cupcakes. It saved me some time which is a good thing.


Nutella Buttercream Frosting:

•5 large egg whites
•1 1/2 cup sugar
•4 sticks unsalted butter, diced and softened
•1/2 cup of Nutella

DIRECTIONS:
1. Put egg whites and sugar into the top of a double boiler over a pan of simmering water. Whisking constantly, cook until sugar has dissolved and mixture is warm (about 160 degrees)

2. Pour heated egg whites into the bowl of an electric mixer fitted with the whisk attachment. Beat egg white mixture on high speed until it forms stiff (but not dry) peaks. Continue beating until fluffy and cooled, about 7 minutes total.

3. Switch to the paddle attachment. With mixer on medium-low, add butter two tablespoons at a time, beating well after each addition. Increase speed to medium-high; continue beating until frosting appears thick, about 3 minutes.

4. Reduce speed to low; add Nutella a few tablespoons at a time and continue beating until incorporated.

Easy enough. Look up Swiss buttercream or French buttercream. I think they have a lot more flavor without being so sweet. Let me know how your experiments go!

April 11, 2013

Baby Shower

Like I said on my previous post, I haven't done a ton of baking in the past year and half, but I did one big event: my sister-in-law's baby shower. My family assembles at my parent's house for Christmas and this year my mom and I planned to throw a surprise baby shower for my sister-in-law, Sarah. My brother and Sarah flew in on Saturday afternoon and as soon as they stepped into our newly re-finished basement, we yelled 'SURPRISE!'. It was a shock for Sarah but she was really happy. As one of the hostesses, I couldn't have been more pleased with how everything turned out. We did a French Country/Afternoon Tea Party theme. All of the food was French-ish. I made most of the food myself including French macarons and Nutella cupcakes. We also had baked brie, crudites in French bread, mini-quiches, madeline cookies, and meringues.


The decorations were handmade by my other sister-in-law, Jenny, and myself. We used tons of scrapbook paper and a circle-cutter (if you don't have one, I would suggest investing in one. It makes life so easy.). We created lanterns, place settings, a back-drop for the food table, a banner made out of doilies that said 'Bienvenue Bebe', and circle confetti for the table. We used all of my mom's tea cups and her tea kettles served as vases for flowers. The decorations looked fabulous. Feminine and dainty and nothing screamed "BABY!".


As we all know that baby shower activities and games have been over-done and they can get kind of annoying after a while. I decided to jump on the trend of making baby onesies. I bought onesies of different sizes and a few decorations but I gave instructions to the ladies to bring some of their own like iron-ons, buttons, and other things. We set up the corner with a table and ironing board with an iron. I think everyone had fun making a personal onesie for the baby.


All in all, it was a fabulous party enjoyed by all. In my coming posts I will share the recipes that I used in the shower.

Picture credit: All pictures were taken by my sister-in-law, Jenny.